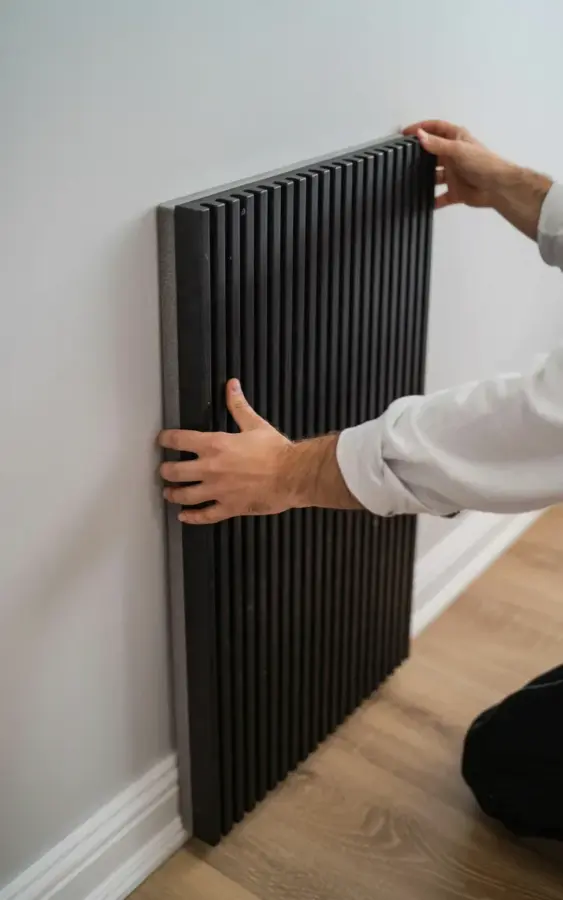
Installing acoustic slat panels looked like a job for a professional crew when I first unboxed ours. Then I realized the whole thing is basically a giant, forgiving puzzle, and I was the only one standing in the way of me getting it done. This acoustic slat panel installation took me a lazy Saturday afternoon, and honestly, the hardest part was convincing myself to start. This closeup photo from my own living room shows the exact moment I held the black panel at a slight angle against our matte white wall, trying to line up the grooves before committing to the press.
## Why Slat Panels Work (And Why I Picked Matte White)
Look, acoustic panels get a reputation for being some high-end audiophile gear, but they aren’t just for recording studios. Our living room had this weird echo bouncing off the vaulted ceiling, and a couple of these panels solved that without making the room feel like a padded cell. The sound deadening is real, but the visual change is what got my partner on board.
We went with black panels on a white matte wall because the contrast is just so clean. The photo shows that exact combination, and the light wood floor underneath catches the light and makes the dark slats look less heavy. If you have a white wall, do not be scared of dark wood or black panels. The floor, especially a light hardwood, anchors the whole thing and stops it from looking like a black hole.
## What You Need Before You Start
Ok so, let’s talk about the shopping list because nobody wants to run to the hardware store mid-project with adhesive on their fingers. You need the panels themselves, obviously, and you need to measure your wall space twice. I cannot stress this enough, measure in three different spots because walls are never actually straight.
For the actual installation, here is what I used:
– A strong construction adhesive (the kind that comes in a caulk tube)
– A caulk gun (trust me, get a decent one, not the squeaky $5 model)
– Spacers or small blocks of wood to keep the panel gaps even
– A level that isn’t tiny and useless
– Pencil, tape measure, and a sharp utility knife
– A rubber mallet or just your hands, and some patience
The most specific detail that actually made a difference? Chalk. A chalk line snapped against the wall gives you a straight reference, and the chalk lines wipe off easily when you miss. I missed. A lot.
## How to Mark the Wall Without Losing Your Mind
Here’s the thing, you cannot just slap the first panel in the corner and hope for the best. You need a vertical reference line, because if the first one leans, the entire wall leans with it. I measured out from the corner, factored in a small gap for expansion, and snapped a line that my level confirmed was plumb.
I will tell you something that annoyed me to no end: my walls are not flat. There is a slight bow near the outlet, and the level showed me immediately. You have to decide right then whether you are going to shim it or just live with the tiny, invisible gap. I lived with it. I don’t regret it.
Once that line is straight, you are basically done with the hard part. Apply the adhesive in a zigzag pattern on the back of the panel, but leave about two inches clean around the edges so it doesn’t squeeze out everywhere when you press it flat.
## The Best Way to Apply Adhesive (And Not Make a Mess)
The photo shows me holding the black panel at an angle, which is exactly the correct technique. You angle the top edge against the wall first, using it as a hinge. Then you slowly rotate the bottom edge toward the baseboard, which lets you position it without the adhesive touching the wall prematurely.
When you are lining it up, remember that the adhesive grabs instantly. There is no sliding it around once it touches, so hover it close, eye up the gap, and commit. I held mine at that angle for a few seconds, checking my level, and then pressed the top edge flat first, working down toward the floor in one smooth motion.
Apply firm, even pressure across the whole surface. I used my palms, not my fingertips, because fingertips can leave dents in some softer woods. Honestly, our black panels were rigid enough that it didn’t matter much, but the technique feels professional and that made me happy.
## The Second Panel and the Gap Trick
For the next panel, you repeat the process, but now you have to manage the seam. This was the part I was dreading, and it turned out to be nothing. You press the second panel flush against the first one, and if the wall is straight, the seam is invisible. If the wall is curving, you get a tiny shadow line, which honestly looks fine with black slats.
I used simple wooden spacers at the bottom to keep the gap between panels consistent. The gap matters, you don’t want them touching because wood expands and contracts with humidity, and a tight seam can cause buckling. A uniform gap is also the difference between a DIY job and one that looks professional.
You will notice in the photo that the baseboards are a clean white, which means I had to cut the panel to fit around them. Utility knife trick: score the line five or six times, deeply, then snap it over the edge of a table. Always cut the face down so the splintering happens on the back.
## The Reality Check: Corners, Outlets, and Dust
Here is a mild complaint that a template blog wouldn’t mention: cutting out holes for electrical outlets is a level of concentration that I was not prepared for. You trace the outlet box on the back of the panel, cut a rough hole, and pray the cover plate will hide the edges. Mine did, but I had to trim a little extra on the bottom left corner.
Also, the dust. Sanding the edges of these panels creates a fine, dark dust that gets absolutely everywhere. I found black dust on the ceiling, which makes no sense, but there it was. Do yourself a favor and wipe down the panels with a damp microfiber cloth before you install them.
Working around the white baseboard was actually the easiest part. Our baseboards are only about four inches tall, and the panel sat flush against them. At the bottom, I left a quarter-inch gap, which you can’t really see in the photo, but it helps with air circulation behind the panel.
## Tools and Cleanup Notes From My Install Day
I made plenty of mistakes, but none of them were fatal. One panel I pressed with too much adhesive and it squirted out horizontally, I cleaned it up immediately with a damp cloth, so it never dried. Use less adhesive than you think. The product expands slightly as it dries.
My final tool list got shorter as I went. By the third panel, I was just using a level, the caulk gun, and a lot of confidence. The spacers were essential for consistency, and I used a scrap piece of the panel itself as a pressure block to make sure the edges were flush.
One more thing, let the adhesive cure for at least 24 hours before you hang anything on the panels. I know you will want to instantly put a shelf on there, but it will fall off and take a chunk of the slat with it. Not that I know from experience. Ok, maybe I know from experience.
## Is a Blank Slat Wall Panel Worth It?
Honestly, yes. The room looks different, the echo is gone, and I walk past the wall and run my hand along the slats like I’m in a movie. The project cost me far less than hiring someone, and it took a single afternoon rather than a whole weekend.
The combination of black panels, white matte paint, and light wood flooring is a killer combo that feels modern without being cold. If you are staring at a box of panels right now, just start with one wall, or even a single panel as a feature piece. Once you see it up there, you will know exactly what you want to do with the rest.
Save this post for when you are ready to tackle your own acoustic slat panel installation. The project is forgiving, the payoff is huge, and the sense of accomplishment when you step back and see a perfectly straight row of slats? There is nothing else like it.
Leave a Comment