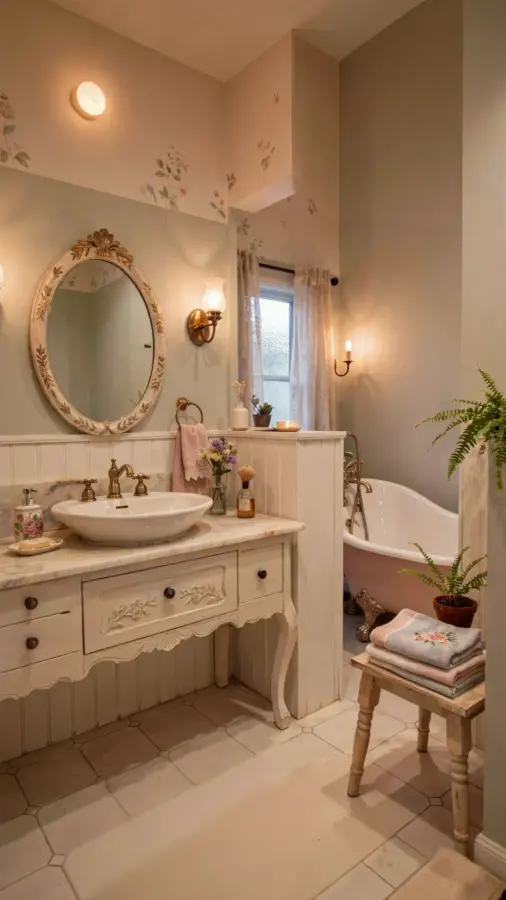
You finally cleared the counter enough to see the sink, but then the morning rush happened again. That compact bathroom vanity has a way of swallowing every tube, bottle, and washcloth you own. The good news is that you don’t need a full remodel to make it work. A simple shift in layout, with open shelving beside the sink, can change everything for a spring refresh. This is one of those small bathroom ideas that feels practical, looks intentional, and gives every item a clear home without adding a bulky cabinet.
Step 1: Clear Off Every Surface Completely
Before you measure or buy anything, empty the entire vanity top and the space underneath. Place everything in a cardboard box or laundry basket so you can sort through it honestly. You will probably discover three nearly empty shampoo bottles and a stash of hotel soaps you forgot existed.
Use this moment to separate daily essentials from occasional extras. Daily items are the ones you reach for at least once a week, like your toothbrush, moisturizer, and the allergy medicine that saves you every spring. Occasional items, such as guest towels or a hair mask you use monthly, belong somewhere less visible.
Take a photo of your clear counter before you continue. That image will remind you why you are doing this, especially when the shelves start filling up.
Step 2: Measure the Wall and Floor Space Like a Pro
Now grab a tape measure and record three key numbers: the width of the vanity, the distance from the floor to the bottom of the sink basin, and the clear depth from the wall to the front edge.
Open shelving works best when it sits directly beside or above the sink, not in a tight corner where you can never reach the back. Write down the exact wall area where you plan to place a shelving unit. Subtract at least four inches from the width of that area so the unit doesn’t feel crammed against the vanity or the door frame.
- Width of the free wall space in inches.
- Distance from the floor to the vanity top.
- Height range for shelves to remain within easy reach.
- Depth limit so shelves don’t bump into your leg while you wash your hands.
Keep these numbers on your phone or a sticky note. They will be your guide when you compare shelving options online or in the store.
Step 3: Pick a Sturdy Shelving Unit That Actually Holds Wait
Not every shelving unit can handle bathroom weight and moisture. Look for something with a solid frame, preferably metal or treated wood, and shelves rated for at least 25 pounds each. A flimsy three-tier rack might look cute, but it will wobble the first time you bump it with a hip.
Because this is a bathroom refresh, choose a unit with a small footprint, like a narrow ladder shelf or a wall-mounted floating shelf. If you want the sink in the middle setup, you need a separate shelving unit on one or both sides, not a single wide cabinet that blocks the sink door. A tall, slim bookcase style unit next to the vanity offers vertical storage without eating up floor space.
Test the shelf height before you commit. The top shelf should sit about shoulder height, and the bottom shelf should sit at least six inches above the floor to make sweeping easier.
Step 4: Position the Sink in the Middle for Easy Flow
The idea behind a center sink with shelving on both sides is simple: you keep the water source in the middle and put storage where your hands naturally reach. When you stand in front of the sink, you can grab a towel from the left shelf and your face wash from the right without turning your body.
Start by placing the main shelving unit on the side where you usually dry your hands. If you are right handed, that is typically the right side. Then add a smaller floating shelf above the toilet or on the opposite wall for backup items.
Make sure the shelving unit does not block the partial swing of any cabinet doors. Also leave a clear path to the sink, at least twenty inches of open floor in front. This small layout change is what makes the whole room feel less chaotic during a busy spring morning.
Step 5: Style Open Shelves With Daily Essentials First
Open shelves only work if you give every object a visible place and resist stacking things too deep. Start with the middle shelf for items you use daily. Use a small ceramic tray to group toothbrushes, toothpaste, and a tiny cup. Fold hand towels in neat thirds and stack them on the lower shelf so they are easy to grab.
The top shelf can hold a small jar of cotton rounds, a basket of hair ties, and your least pretty bottles hidden inside a lidded container. The bottom shelf is perfect for a clean wastebasket or a rolled basket with spare toilet paper rolls. Keep the front edge of each shelf partially empty so the unit looks airy rather than stuffed.
A simple rule: if you haven’t touched it in three months, it doesn’t belong on open shelving. Periodically rotate seasonal items, like switching a rich winter lotion for a lighter spring formula.
Step 6: Add Fresh Spring Touches That Keep Counters Clear
Now that your bathroom vanity has a clear top and functional shelving, bring in a few light, seasonal details. A small pot of eucalyptus on the far corner adds a gentle green pop and a fresh scent without taking up useful space. Swap dark towels for a lighter color like sage, white, or pale yellow to instantly brighten the room.
Use a tiny bud vase with one or two stems on the shelf, not a large bouquet that blocks your view. Replace the heavy pump bottles with smaller ones that fit neatly on a tray. This is also the perfect time to check for expired sunscreen or old razors and toss them in the bin.
Your goal for a spring cleaning refresh is to reduce visual noise, so every shelf should have a clear purpose. If a shelf starts to look busy, remove one item from it. That simple habit keeps the whole room looking calm for months.
Open shelving beside a small vanity is one of those smart bathroom ideas that pays off every single day. You get more storage, but the space still feels open and easy to clean. Take your measurements, pick a sturdy shelf, and arrange items by how often you use them. Save this guide for your next bathroom refresh, and start with just one shelf today. Your counters will thank you.
Leave a Comment