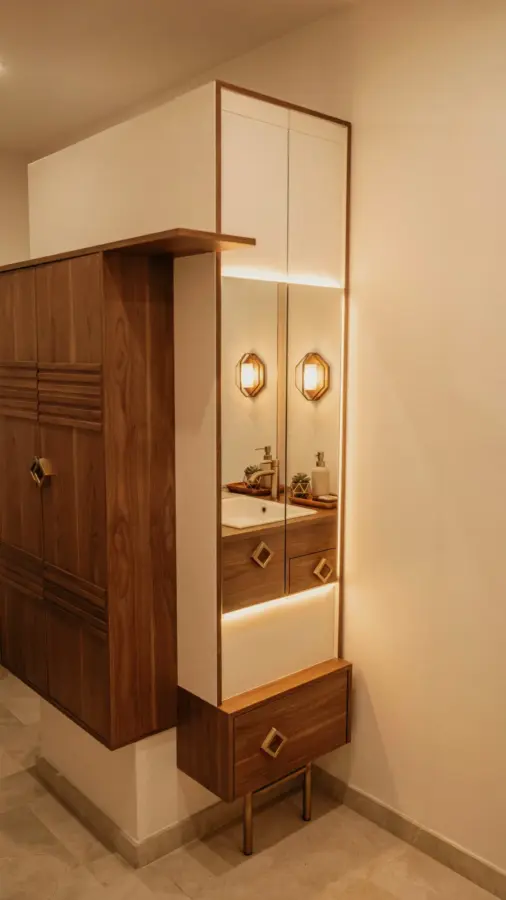
Why We Decided on a Custom Bathroom Vanity
Our small main bathroom had a basic builder-grade vanity for years: a stock white laminate cabinet with a cultured marble top that had yellowed around the edges. It felt cramped and forgettable. When I started researching a custom bathroom vanity makeover, I knew dark wood and marble could add warmth and elegance without eating up floor space. The goal was to make the room feel intentional, not just functional. A custom piece let us control every dimension, which is critical in a tight space.
We measured the alcove three times before reaching out to a local cabinetmaker. The original vanity was 36 inches wide with a single sink. By going custom, we could stretch to 42 inches and add open shelving on both sides. That extra width made the room feel larger instantly.
Choosing Dark Walnut Cabinets for a Small Bathroom
Dark wood in a small bathroom can feel heavy if not done carefully. We selected rift-cut walnut with a satin matte finish. The grain is subtle but present, which keeps the cabinets from looking like a solid black block. The cabinetmaker recommended a soft-close drawer system and full-extension slides, and I am glad I listened.
One practical tip: if you have a small space, avoid overly glossy finishes. They show every water spot and fingerprint. Our matte walnut hides daily splashes much better than the old high-gloss white did. We also chose cup pulls in brushed brass instead of knobs, which makes opening drawers easy even with wet hands.
- Wood species: Rift-cut walnut (more stable than plain-sliced)
- Finish: Satin matte lacquer, no gloss
- Hardware: Brushed brass cup pulls and knobs
- Drawers: Full extension, soft close, dovetail joints
The Marble Countertop Decision and What We Learned
Marble is not the most practical choice for a bathroom. It etches, it stains, and it can be porous. But I wanted that veined, soft look against the dark walnut. We went with Carrara marble with a honed finish (matte, not polished) because honed hides etching much better. The fabricator sealed it twice before installation, and we reapply sealer every six months.
If you are considering marble for a bathroom vanity makeover, here is what actually works: choose a light veining pattern, keep the backsplash integrated (no grout line where counter meets wall), and use a vessel sink or an undermount sink that sits below the marble. We used an undermount rectangular basin that maximizes counter space. The marble extends 4 inches up the wall as a backsplash, which eliminated the ugly seam common in builder-grade setups.
Adding Open Shelving for an Airy Feel
Storage was a concern. The old vanity had two shallow drawers and a cabinet below the sink, but we needed room for towels, toiletries, and cleaning supplies. Instead of a bulky upper cabinet, we asked the cabinetmaker to build open shelves on each side of the vanity. Each shelf is 10 inches deep and 24 inches wide, framed in the same walnut as the cabinets.
The shelves keep the space looking open. We store rolled hand towels in woven baskets on the bottom shelf, a jar of cotton balls on the middle, and a small plant on the top. The key is to edit what you put on open shelves. We keep only items that look intentional, and everything else stays inside the vanity drawers. That balance makes the room feel organized without being cluttered.
The Before and After: What Actually Changed
Before: a 36-inch white laminate vanity with a cultured marble top that had a fake, waxy sheen. The sink was a small drop-in oval with almost no counter space. After: a 42-inch custom walnut vanity with a honed Carrara marble top, an undermount sink, and open shelving. The mirror went from a cheap frameless rectangle to a brass framed arch that echoes the hardware.
One surprise was how much the new vanity improved the light. The old top was off-white and flat; the marble has subtle gray veining that bounces light around the room. The dark cabinets anchor the floor while the open shelves keep the upper part of the room light. Even the plumbing made a difference: we switched from a center-set faucet to a widespread faucet with a higher spout, which makes hand washing feel more luxurious.
Tips for Planning Your Own Bathroom Vanity Makeover
If you are tackling a similar project, here are the practical steps that helped us:
- Measure everything twice including rough-in plumbing locations. Custom cabinets can adjust to odd spaces, but moving pipes is expensive.
- Order samples of wood and stone before committing. We were sure we wanted walnut and Carrara, but seeing the samples in our actual bathroom light changed our mind on the finish (we went from gloss to matte).
- Plan for storage behind closed doors. Open shelves are great, but you still need hidden storage for less pretty items. Our vanity has three deep drawers and a pull-out cabinet for hair tools.
- Hire a local cabinetmaker or a custom shop. Big box stores can do semi-custom, but for a small space you want someone who will tweak every dimension. Our maker charged about 20% more than stock cabinets, but the fit was perfect.
- Protect the marble. Use coasters for bottles, wipe up spills quickly, and avoid harsh cleaners. A mild soap and water is all you need.
Final Thoughts on Our Custom Cabinetry Project
This bathroom remodel took about six weeks from design to installation, with two weeks of actual construction. The biggest headache was waiting for the marble template to be cut, but the result made it worth every delay. Our small bathroom now feels like a intentional room, not just a pass-through space. The dark walnut and marble combination gives it a warm, grounded feel that the old builder-grade setup never had.
If you are planning a similar bathroom vanity makeover, I hope this story helps you make confident choices. Every space is different, but custom cabinetry and thoughtful materials can transform even the smallest bathroom. Have you tried a dark wood and marble combination? I would love to hear how it worked in your home.
#bathroomvanity #customcabinetry #bathroomremodel #smallbathroomdesign #beforeandafter
Leave a Comment